Window Tint Installation Process Explained
A clean install does not start when the film hits the glass. It starts much earlier – with the right film, the right surface prep, and a shop that treats tint like a precision upgrade instead of a quick add-on. If you have ever wondered what the window tint installation process actually looks like, knowing the steps makes it easier to spot quality work and avoid a job that peels, bubbles, or turns purple too soon.
For drivers in South Florida, this matters even more. Heat, UV exposure, salt air, and daily sun punishment can expose weak materials and rushed installs fast. The same goes for homes, storefronts, boats, and work vehicles. Good tint should look sharp on day one, but it also needs to hold up.
What happens before the window tint installation process starts
The best tint jobs begin with a conversation, not a roll of film. A professional installer usually starts by asking how you use the vehicle or space, what level of privacy you want, and what matters most – heat rejection, glare control, UV protection, security, appearance, or a mix of all of it.
That step matters because not all films perform the same way. Dyed film can be budget-friendly and improve looks, but it is not the strongest choice for heat rejection or long-term color stability. Carbon and ceramic films cost more, yet they usually deliver stronger performance, better clarity, and better durability. On homes and commercial glass, the options can get even more specific depending on sun exposure, energy goals, and glass type.
This is also where legal limits come into play for automotive tint. A quality shop will explain what is allowed, what look you are after, and where the trade-offs are. Darker is not always better. In many cases, a high-performance ceramic film with a moderate shade gives you better comfort than a darker low-end film.
Surface prep is where quality is won or lost
If there is one stage that separates a premium install from a sloppy one, it is prep. Glass has to be cleaned far beyond what most people consider clean. Dust, oils, fingerprints, adhesive residue, pet hair, and tiny debris can all get trapped under film. Once that happens, the finish is compromised.
Installers use specialized cleaning solutions, lint-free towels, squeegees, and blades designed for safe surface prep. On automotive glass, they also work carefully around seals, defrosters, sensors, and tight edges. Rear windows can be especially tricky because of their curve and the presence of defrost lines.
This part is not glamorous, but it is a big deal. If a shop rushes prep, the rest of the job is already working from behind. A properly prepped window gives the adhesive its best chance to bond evenly and stay stable over time.
Cutting and shaping the film
Once the glass is fully prepped, the film is measured and cut to fit the window. Some shops use plotters for precision cutting. Others hand-cut patterns depending on the application and the level of customization needed. Either way, the goal is the same – a clean fit that matches the glass closely without rough edges or unnecessary gaps.
On automotive windows, the film often needs to be heat-shaped before installation, especially on curved rear glass. This is one of the more technical parts of the process. Heat shrinking allows the film to conform to the shape of the window without fingers, creases, or distortion. It takes experience and a steady hand to do it right.
For flat glass in residential or commercial settings, shaping is usually more straightforward, but precision still matters. A bad cut can make even a premium film look cheap.
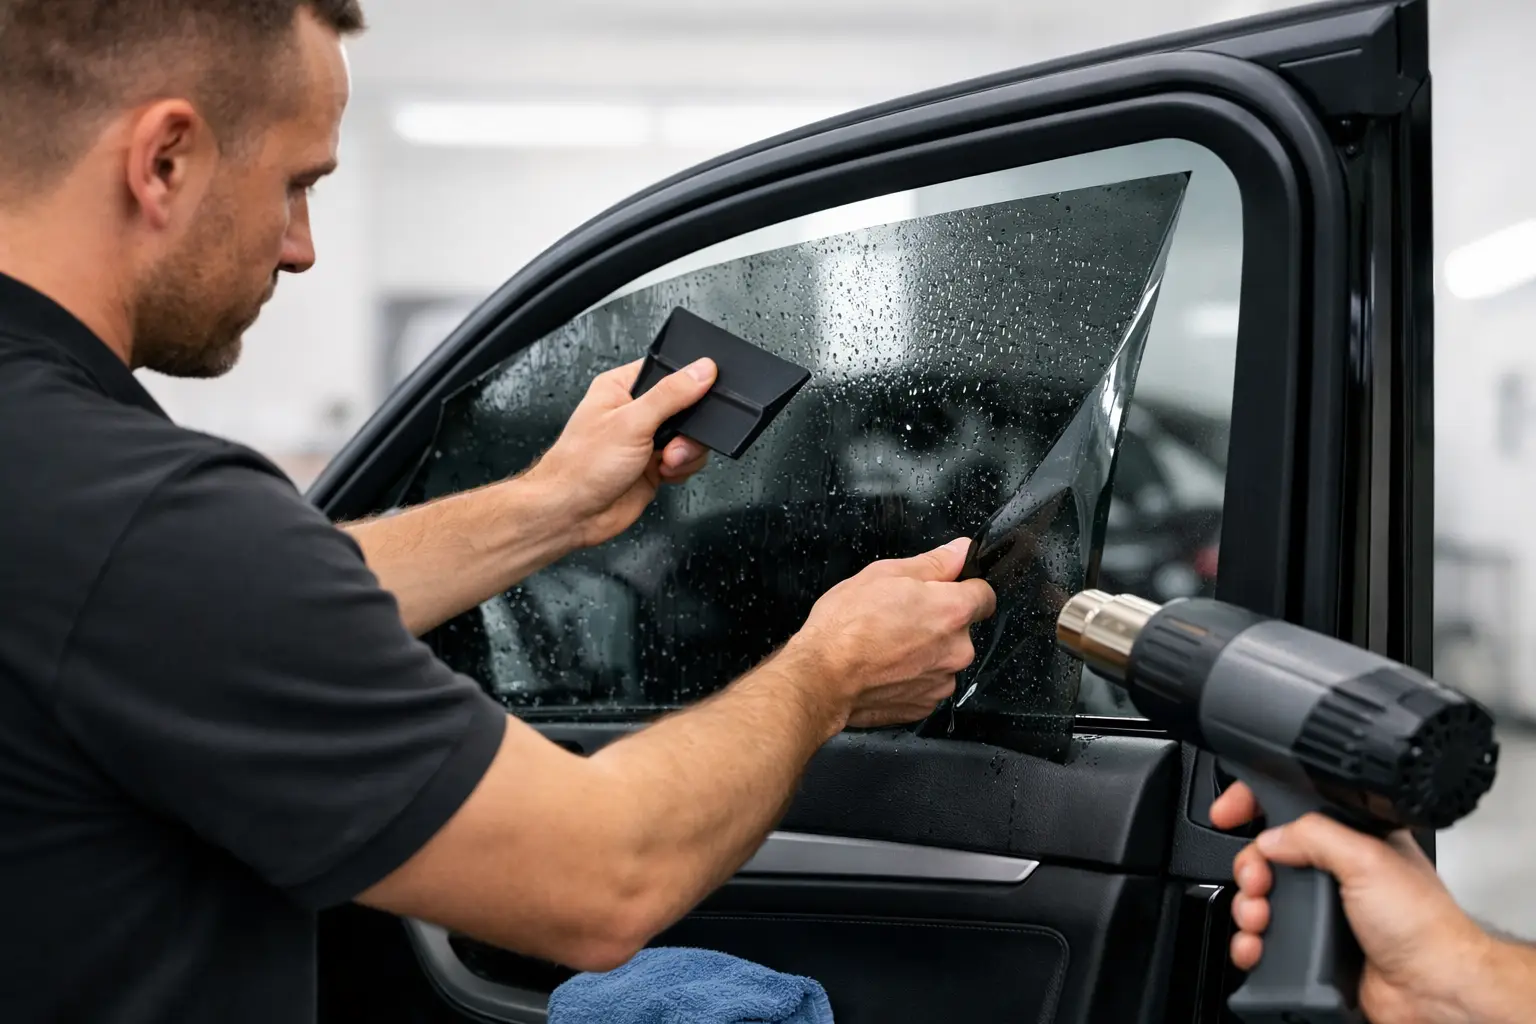
Applying the film to the glass
This is the step most people picture when they think about tint installation. After the liner is removed, the adhesive side of the film is applied to the wet glass. The moisture helps the installer position the film accurately before locking it in place.
From there, the installer uses squeegees and application tools to press out the water and air between the film and the glass. The goal is a smooth, even bond with no contamination trapped underneath. This takes patience. Press too hard in the wrong area and the film can shift or crease. Move too fast and you can leave moisture pockets behind.
On roll-down windows, edge alignment is a big part of a clean final look. On rear glass, consistency matters across the full curve. On architectural glass, the installer has to manage larger film sections while keeping the surface clean and the pattern straight. Different glass types demand different handling, which is why experience across automotive, residential, commercial, and marine applications makes a real difference.
Why small bubbles and haze can be normal at first
A lot of customers expect the tint to look fully finished the second the install is done. Sometimes it does look nearly perfect right away. Other times, you may notice a little haze, a few small moisture pockets, or a slightly cloudy appearance during the curing stage.
That does not automatically mean something went wrong. Fresh tint needs time for remaining moisture to evaporate and for the adhesive to fully settle. In hot climates, this can happen faster. In cooler or more humid conditions, it can take longer. The film should gradually clear as it cures.
What should not happen is obvious contamination, large persistent bubbles, peeling edges, or visible misalignment. Those are signs of poor prep, poor handling, or poor material quality.
Cure time and aftercare
The window tint installation process is not truly finished when the vehicle leaves the shop or when the installer packs up at your home or business. Cure time is part of the job. During this period, the adhesive is still stabilizing.
For automotive tint, customers are often told not to roll windows down for a few days. That protects the edges while the film settles in place. Cleaning should also be done carefully. Ammonia-based cleaners can damage certain films, so a shop should tell you what to use and what to avoid.
For residential and commercial tint, cure time can vary based on film type, glass size, weather, and indoor conditions. It is normal for the film to continue settling after installation. The key is following the care instructions instead of treating it like finished glass on hour one.
What affects the final result
Two installs can use similar-looking film and end up with very different results. The difference usually comes down to craftsmanship, material quality, and environment.
A controlled installation area helps limit dust and contamination. High-quality film holds color and performance better over time. Skilled installers know how to prep problem glass, manage complex curves, trim edges cleanly, and work around electronics or delicate surfaces. Those details matter far more than flashy sales talk.
It also depends on the application. A daily driver parked in direct Florida sun has different demands than a weekend boat or a storefront facing west all afternoon. A one-size-fits-all recommendation usually means the shop is selling inventory, not solving your problem.
Choosing the right shop for the job
If you are comparing providers, ask about the film options, warranty coverage, expected cure time, and how the shop handles edge finishing and glass prep. Ask what they recommend for your specific goals instead of asking only for the darkest or cheapest option.
A serious shop should be able to explain the difference between appearance-focused tint and performance-focused tint. They should also be comfortable working through custom requests, whether that means matching the style of your vehicle, improving comfort in a sun-soaked living room, or outfitting a fleet for a cleaner, more professional look.
That is where a customization-focused installer stands out. When tint is treated as part of a bigger comfort, style, and protection strategy, the result is better than a basic install. It looks intentional. It performs the way it should. And it adds value every time you get behind the wheel or walk into the space.
At Tint Station, that hands-on approach is the whole point. The goal is not to push film onto glass as fast as possible. It is to deliver a finished result that feels right for the vehicle, property, or project.
If you are thinking about tint, ask better questions before the film ever comes out of the box. The right install should give you cleaner looks, real heat rejection, better privacy, and a finish that still holds up long after day one excitement wears off.